Organising Photos with Picasa

Tutorials and information on how to get your precious photo collection organised with Google Picasa. Please note this guide is work in progress. It is written for the attendees of our photo management computer course.
What is Google Picasa
Google Picasa is a Photo management software. A Photo management softwareis an essential tool for organizing the huge amount of photos you have. From chaos to an organised mess.
What can it do?
- Photo Management, including viewing and searching
- Importing photos from camera, memory card and hard drive etc...
- Easy photo editing (simple and useful editing tools. Keep the original copy)
- Printing (with your own colour printer)
- Exporting (take it to a print shop to print the photo)
- Backup
- Look for duplicates
- Other advanced features e.g. Facial recognition and tagging
- And many more… (tip of the iceberg)
Why Google Picasa?
- It is one of the best photo management tool in the business. It is free. It is easy to use and it does many things very well.
- It is light weight (uses little space and resources on your computer) and it is fast. Good for older computers.
- It does not copy or touch your photos unless you tell it otherwise. Unlike iPhoto / Photos on the Apple Mac that will copy and duplicates photos into its own environment.
- If you modifiy a photo in Picasa, it keeps the original and you can revert back to the original at any time.
- It helps you to reduce duplicates by stopping you from importing photos that are already on your computer and it can show you a list of duplicated photos.
- It works on both Windows based computers and Apple Macs.
- and many more...
Caution!
Google no longer supports or updates Google Picasa. So there will be no improvements or bug fixes with Picasa and Google has switched off many of the web-integrated features. However it is still one of the best photo management software in the market.
Where to download?
It is not easy to find a copy of Picasa to download on the Internet. However we have a got one on our website that you can download from. It is the most up-to-date version.
picasa39-setup.exe (13 MB) for Windows XP, Vista, 7, 8, 8.1, Windows 10.
How to install Picasa?
In this example, we are installing Picasa Windows version on a Windows 10 computer. It will work on Windows XP, Vista, 7, 8, 8.1 too.
Step 1: Once you have downloaded Picasa onto your computer. Double click on "picasa39-setup.exe" to install.

Step 2: When Windows User Account Control ask whether you want to allow Picasa to make changes to your device. Click "Yes" to continue.

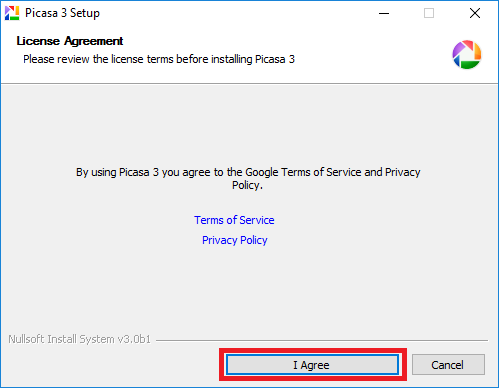
Step 3: Picasa will ask you to review the license agreement. Please feel free to click on the blue links to read the Terms of Service and Privacy Policy. Once you are ready click "I Agree" to continue
Step 4: Picasa will ask you to choose and confirm where to install Picasa on your computer. Unless you have any specific requirements, we would recommend you to leave it as it is and click on "Install" to continue.

Step 5: Wait for Picasa to finish installing the software on your computer. It should take a few minutes. In the meantime, please feel free to go and make your self a cup of tea or coffee. Don't forget to get some biscuits too! :)

Step 6: Picasa has been installed on your computer. Just a few more clicks to complete this step. If you are concerned about your privacy, we would recommend that you should untick "Send anonymous usage stats to Google". Then untick "Run Picasa 3". Click "Finish" to continue

Step 7: Now double click on the "Picasa 3" icon to launch Picasa for the first time.

Step 8: Picasa will help you find all your photos on your computer so that you can manage them well. Unless you have photos everywhere on your computer, we would recommend that you choose the option "Only search My Documents, My Pictures and the Desktop". For your information, you can add some more folders into Picasa later. Now click "Continue" to continue.

Step 9: Picasa will ask you whether you want to use it as your default photo viewers for the photos on your computer. It is a personal preference, you can choose to leave that to Picasa, but in this example, our preference is "Don't use Picasa Photo Viewer", click on that option and click "Finish" to continue.

Step 10: Google Photos backup will ask you whether you want to back up your Picasa photos in the cloud with Google Photos backup. In this example, we choose "No, thanks", but you can always add this back later.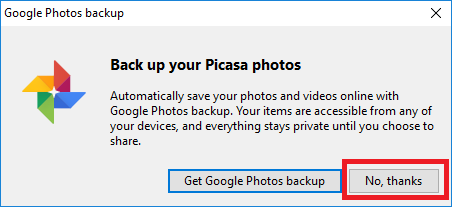
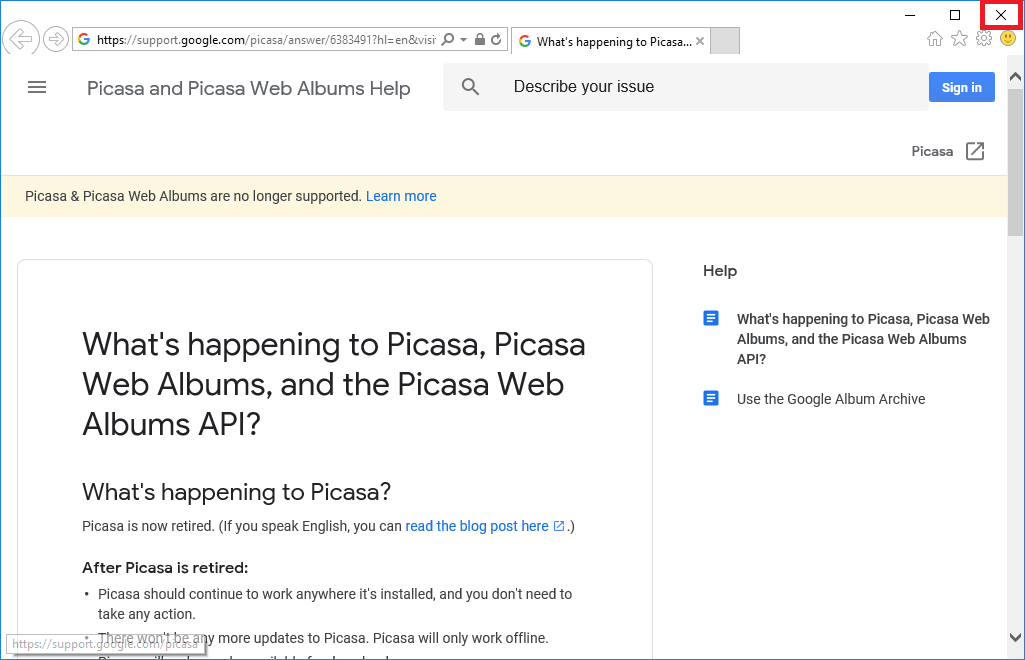
Step 11: Picasa will open a webpage and provide you some updates with regards to Picasa, Picasa Web Albums and the Picasa Web Albums API. It is telling you that they are no longer supported as mentioned at the beginning of this guide. Please feel free to read. Once finished, click "X" to close the window.
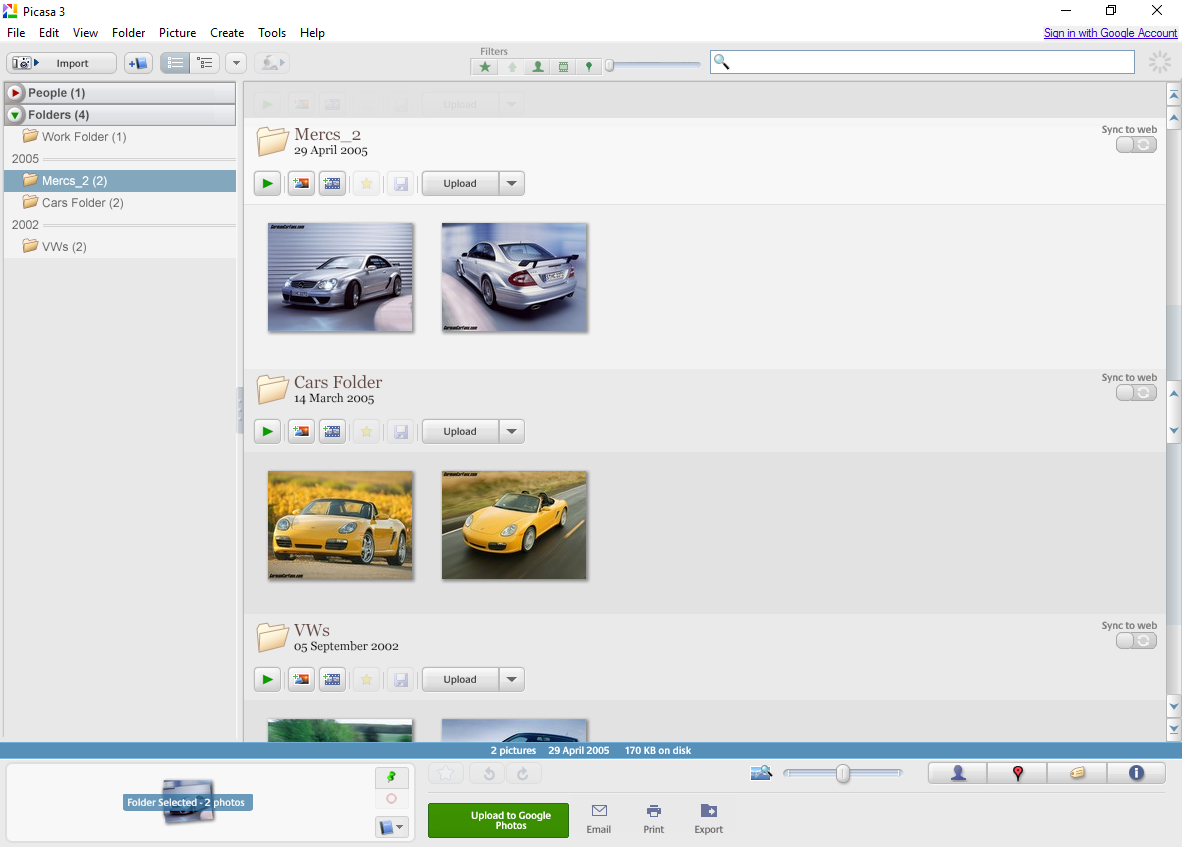
Step 12: Finally, you can see the Picasa main window. Well done! In the meantime, it will continue seaching your computer for photos in the designated areas and display them orderly in this window. Please feel free to export Picasa!
To be continued...
-
Monthly Digital Skills Workshops at Felixstowe Library
Continue reading...
Monthly digital skills workshops for absolute beginners and intermediates every first Tuesday of the month 10am-12pm at the Felixstowe Library.